Installation
Download the plugin ZIP file from the members area.
Login into your WordPress administrator panel and install the plugin.
If you don’t know how to install a WordPress plugin you can read more about it on the WordPress Managing Plugins page.
Create a Quiz
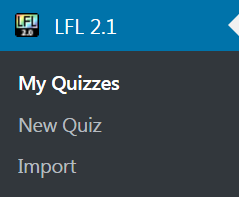
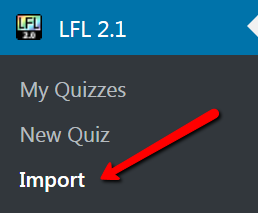
After the plugin is installed the LFL 2.1 menu will appear on the left.
My Quizzes – Here you can manage your quizzes.
New Quiz – Here you can create a new quiz.
Import – Here you can import quizzes.
To create a new quiz click ‘New Quiz’ and fill out the form on the new page.
Quiz Name – Enter a name for your quiz. This is only for your own purpose.
Quiz Type – Select the type of your quiz. You can create 2 types of quizzes. The
first one will have one set of answers for all questions. Second type allows you to
have different answers for each question.
Quiz Theme – Select the color of your quiz.
Questions on each page – Enter a number of questions to show per page. The
number of pages will be automatically calculcated based on the number of
questions. For example if you have 10 questions and show 5 questions per page
the plugin will generate 2 steps before forwarding to the right optin form.
Header Message – The content of the header message will be displayed on the
quiz first step just before the questions. The header is not displayed on any other
page. Here you add the copy that should introduce the quiz. Shortcodes are
allowed.
Quiz Results Delaying Animation – When enabled, before showing the quiz results
the plugin displays the results loading animation with your message. Check the
box to enable the animation.
Quiz Results Loader – When the animation is enabled the text from this field will
be displayed above the animation for the selected number of seconds. You can
have as many loaders as you want. Click “Add Another Loader” to add another
one with a different message and delay time.
Social Sharing – When checked a Facebook share button will be displayed on the
quiz results page. Great option to do fun quizzes that could go viral. You can also
change the sharing button call-to-action in the text field below.
Social Meta Tags – Use the social meta tags to increase the number of likes and
shares / retweets of your quiz by making the shareable link look good on social
networks.
If you have a SEO or any other plugin activated that already sets the social/graph
meta tags, then you can either disable the LFL social meta tags option OR look for
a way to disable the other plugin on pages where you have the quiz enabled.
The Facebook validator does not like when there’s duplicated meta tags on a
page. That could happen when you have both LFL social meta tags and some other
plugin enabled at the same time.
After saving the quiz settings you can preview the the share using the following
tools:
Twitter Card Validator (you need to be logged in)
Facebook Debugger
Make sure the images have the right size. Facebook image must be 1024×512 and
the Twitter image 750×560. Also remember that Facebook and Twitter crop the
borders a little.

After you have filled the form out click the ‘Create Quiz’ button.
When the quiz is created and activated there will be another option available in the quiz settings called Social Media Analytics.
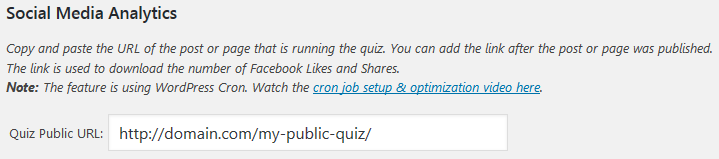
The quiz public URL is used to collect Likes and Share data from Facebook. If the URL is not set or is invalid, then LFL will not be able to get the data.
The feature is using WordPress cron. Watch the cron job setup and optimization video here: https://youtu.be/p29GG87UwaQ
My Quizzes
In the “My Quizzes” section you can manage your current quizzes.
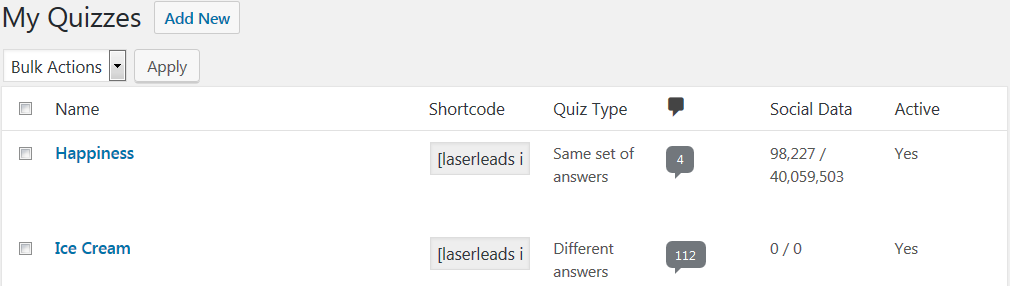
Each quiz listing has 6 columns:
Name – The name of the quiz. This is for internal use only and isn’t publically available.
Shortcode – The quiz shortcode that you can copy and paste into any post or page.
Quiz Type – The quiz type.
Answers (icon) – The number inside the bubble shows the number of quiz takers. Clicking the number will load the stats page.
Social Data – Shows the number of Facebook likes and shares.
Active – Shows if the quiz is activate or not.
By moving the mouse cursor over the quiz name you will see available options:
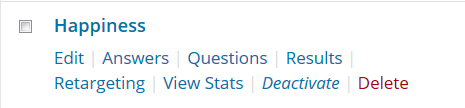
Edit – Edit the settings of your quiz.
Answers – Manage the possible quiz answers (not available for quiz with different
answers)
Questions – Manage the quiz questions.
Results – Manage possible final results, actions and messages based on the final
score or selected answers.
Retargeting – Setup quiz retargeting pixels. Works with any network.
View Stats – The quiz stats including the date the quiz was taken on, time to
finish the quiz, the IP address and a list of selected answers.
Activate/Deacivate – Activate or deactivate the current quiz. If the quiz is
deactivated you will see a reminder box at the top of the settings.
Delete – Removes the quiz from the database including the stats and other
options related to the quiz.
Quiz With Same Set of Answers

Before adding any questions you first need to add or change possible answers and the
default score for each one. By default when you create a new quiz the plugin creates 5
different answers for you (Strongly Agree, Somewhat Agree, Neutral, Somewhat
Disagree and Strongly Disagree).
The score can be in the range of 1 and 250.
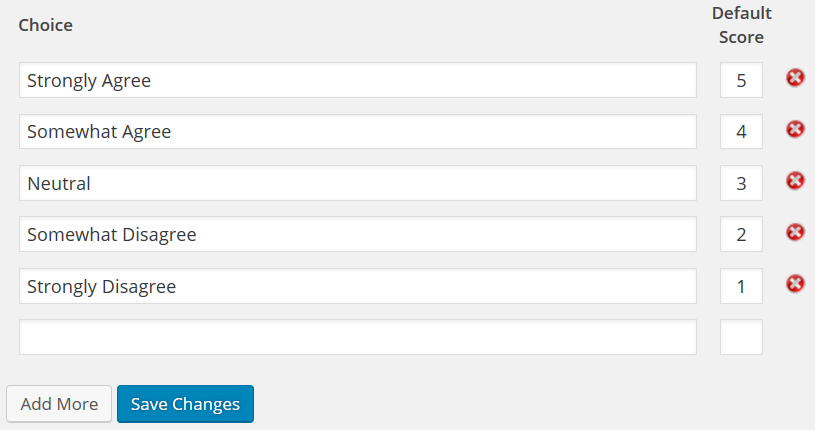
If you want to delete an answer just click the X in the red circle. After you have
removed or added any answers you need to hit ‘Save Changes‘.
Adding a new answer is easy. Just click ‘Add More‘, enter the answer and a score and
click ‘Save Changes‘.
Quiz Questions

After you have added the answers now you can add the actual questions.
Adding a new question is the same as with adding answers. Click ‘Add More‘ and enter
your question.
To delete a question just click the X in the red circle.
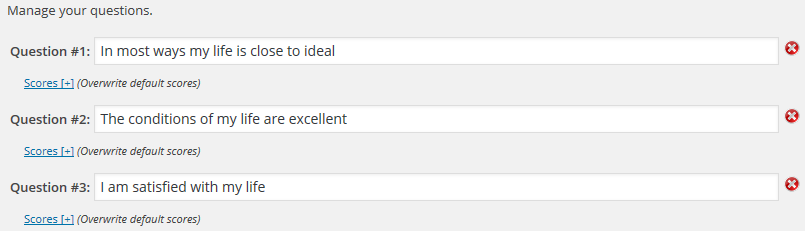
If you want to change the score of an specific answer on each question just click ‘Scores’
that is under each question. This will open a list of your answers with the default scores.
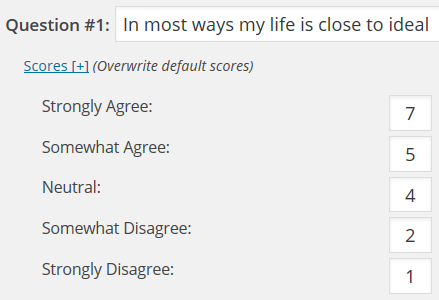
Clicking again the ‘Scores‘ link will close the answers.
After you are ready hit the ‘Save Changes‘ button at the bottom of the page.
Quiz Results

The final step is to setup the results groups that are connected with the final score and
set the right actions for each score range.
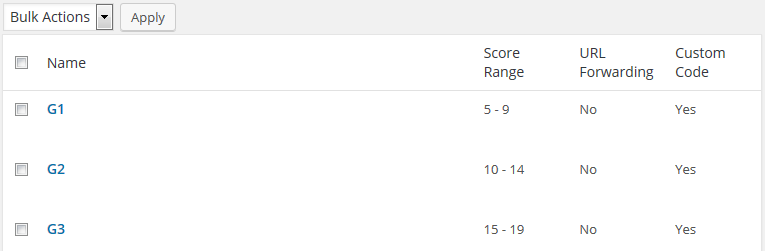
To create a new group click ‘Add New’.
Group Name – Enter a group name. This is for your own use only.
Score Range – Enter the score range that should execute this group. The minimum
allowed score is 1.
Message – The content will be displayed on the final page before the actual optin
box. If a URL is specefied in the ‘Redirect To’ field then the Message box is
ignored.
Custom Code – The custom code will be added after the message. You can copy &
paste the opt-in form HTML code generated by your autoresponder provider or
type any kind of call-to-action or advertisment code here. The custom code will
be ignored if the Redirect To URL is set.
Redirect To – Enter an URL here if you want to forward the quiz taker to an
custom page instead of showing the page generated by the plugin based on the
Message field and the optin form code.
Social Meta Tags – When enabled the quiz main social meta tags are overwritten with the tags in here. This way you can have a different social apperance for each result that is shared on social media (e.g. quiz taker who chose Vanilla and shares the quiz will share a picture with Vanilla ice cream).
After you are ready just click ‘Add Group‘.
Quiz With Different Answers
The quiz with different answers does not have the “Answers” option, because the
answers have to be added in the “Questions” section.
Quiz Questions
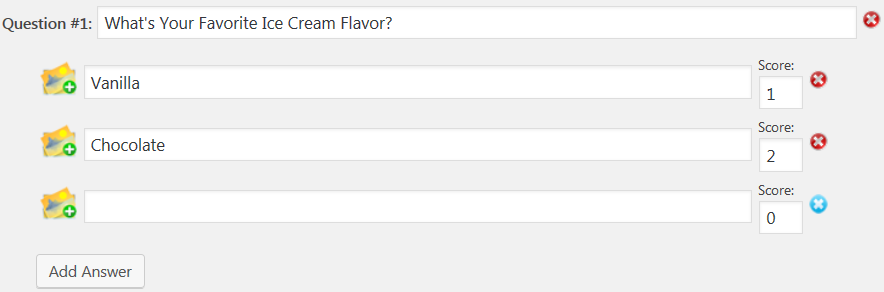
In the “Questions” section you can manage your questions and the answers. The quiz can
have results based on selected answers or the score.
To add another answer just click the “Add Answer” button.
To add another question click the “Add Question” button at the bottom of the page.
![]()
When ready click “Save Changes”.
You can also have images as answers. You can either copy and paste the image URL inside the answer box OR click the image icon with the plus sign that will load the WordPress Media Library and use the WordPress library to manage the images and insert them as answers.

Quiz Results
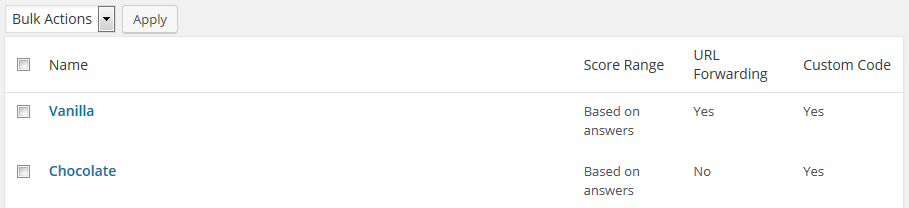
The final step is to setup the results groups that are connected with either the selected
answers or the final score. Then set the right actions for each score range or answers.
To create a new group click ‘Add New’.
Group Name – Enter a group name. This is for your own use only.
Match Type – Select the way the results should be matched. Either by score or the
selected answers.
Select Answers – If the Match Type is set to “Based on selected answers”, then
this option will be visible. Select the answer for each question to be a match for
this group of results.
Score Range – If the Match Type is set to “Based on score range”, then this option
will be visible. Enter the score range that should execute this group. The
minimum allowed score is 1.
Message – The content will be displayed on the final page before the actual optin
box. If a URL is specefied in the ‘Redirect To’ field then the Message box is
ignored.
Custom Code – The custom code will be added after the message. You can copy &
paste the opt-in form HTML code generated by your autoresponder provider or
type any kind of call-to-action or advertisment code here. The custom code will
be ignored if the Redirect To URL is set.
Redirect To – Enter an URL here if you want to forward the quiz taker to an
custom page instead of showing the page generated by the plugin based on the
Message field and the optin form code.
Social Meta Tags – When enabled the quiz main social meta tags are overwritten with the tags in here. This way you can have a different social apperance for each result that is shared on social media (e.g. quiz taker who chose Vanilla and shares the quiz will share a picture with Vanilla ice cream).
After you are ready just click ‘Add Group‘.
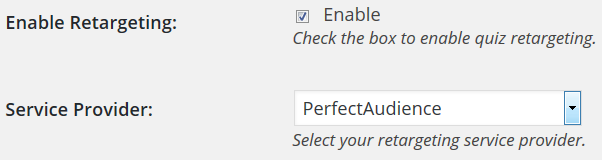
Retargeting Quiz Takers

Using the retargeting feature you can trigger pixels from retargeting services and tag
quiz takers based on the actions. There are 3 actions that can trigger the pixel:
- when the visitor lands on the quiz main page
- when the visitor answers at least one question
- when visitor lands on the final page.
To enable retargeting you need to check the “Enable Retargeting” checkbox, select your
service provider and paste the right code.
Quiz Stats

When the quiz taker lands on the final tab he’s answers along with the IP address, the
date when the quiz was taken and how long it took to finish the quiz are stored in the
database. Click ‘View Stats‘ to see the stats.
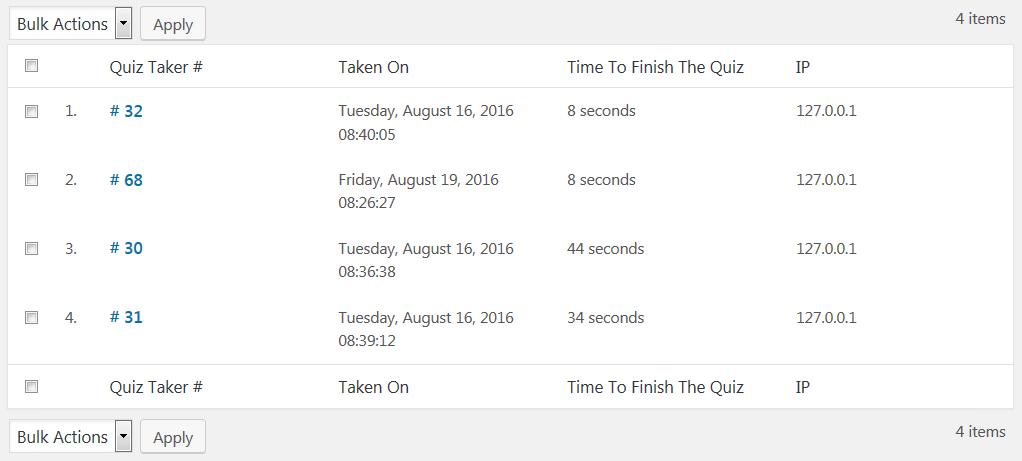
First you will get a listing of all the quiz takers with the extra information. By moving
your mouse cursor over the quiz takers number will show more options that are
available: View Answers and Delete.
When you click View Answers a new box will open and show the answers that the quiz
taker chose.

Publishing The Quiz
Your quiz can be added both to posts and pages including custom post types. When you
edit or create a post or page you will see the ‘Laser Focused Leads’ box under the
content editor.
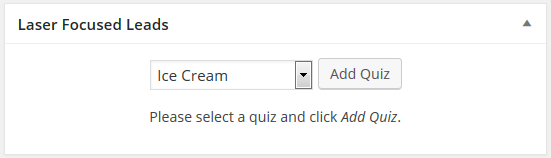
To add the quiz inside your post or page first click in the editor where you want to place
the quiz. After that select your quiz and click ‘Add Quiz’. This will add the shortcode
[ laserleads id=”x” ] inside the content. Publish or Update the post or page and you are
done.

Please note that the content before or after the shortcode will be displayed in all steps
of the quiz. It’s recommended to keep the content itself clean and add the right
messages in the quiz settings and results.
Import / Export The Quiz
In version 2.1 the import/export feature was introduced. Using this feature you can backup your quizzes and import your or any other quiz that was created with LFL v2.1.
Export
To export a quiz first you need to open the quiz settings page. Just click on the quiz name.

At the top navigation you will see the Export button. Clicking it will open up a new window and the browser will ask you to save the file or maybe save the file automatically (depends on your browser settings).
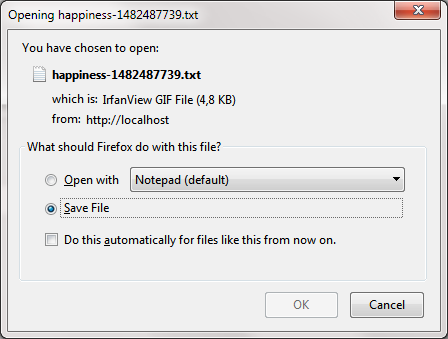
It’s a text file with the quiz name and some random numbers as the filename.
Import
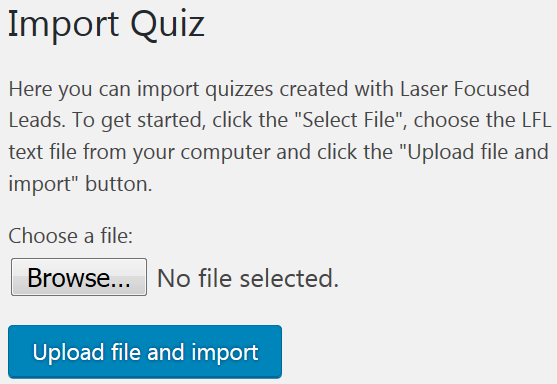
To import a quiz on the left side on the plugin navigation click Import.
On the Import page click “browse”, select the LFL text file, click Okay and then Upload file and import. If there went well, then you will see a message that says that the quiz was imported successfully.
Mobile Devices
The Laser Focused Leads quiz design is responsive. That means they the quiz will look
good on both desktop and mobile devices.
Make sure that your current WordPress theme is also responsive and supports mobile
devices.
